Front-end Development Workflow Tool Grunt
Categories: Study
In the previous article, we introduced the front-end package manager Bower. This time, we come to understand the front-end application development workflow tool Grunt. In the process of JavaScript development, we often encounter some repetitive tasks, such as checking if syntax is correct, compressing code, and merging files. In the past, we would choose different tools to complete different tasks, but this felt both complex and time-consuming. But now with Grunt, Grunt was invented precisely to solve these problems. It can help us automatically manage and run various JavaScript tasks, simplifying our workflow.
Grunt
Why use a task runner?
In a word: automation. The less work you have to do when performing repetitive tasks like minification, compilation, unit testing, linting, etc., the easier your job becomes. After you’ve configured it, a task runner can do most of that mundane work for you—and your team—with basically zero effort. (Official website data)
Why use Grunt?
The Grunt ecosystem is huge and it’s growing every day. With hundreds of plugins to choose from, you can use Grunt to automate just about anything with a minimum of effort. If someone hasn’t already built what you need, authoring and publishing your own Grunt plugin to npm is a breeze. (Official website data)
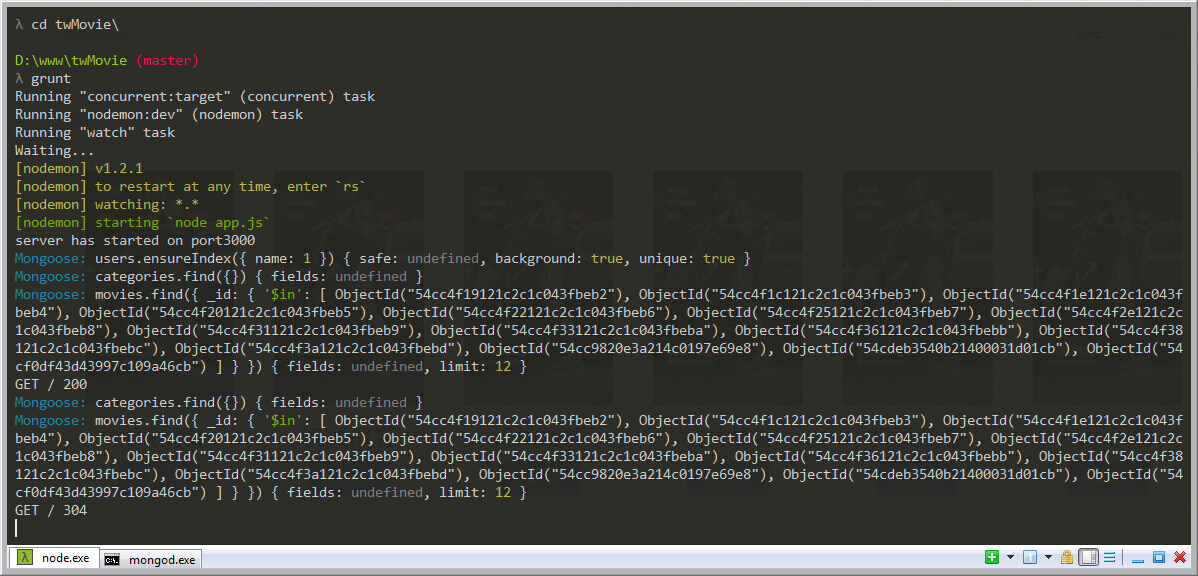
Below let’s see what it looks like when we run Grunt. The figure below is a screenshot of me using Grunt to automatically run one of my Node.js projects:
How to install Grunt?
-
Both Grunt and Grunt plugins are installed and managed via npm, the Node.js package manager. Grunt 0.4.x requires Node.js versions >= 0.8.0 (meaning Node.js versions 0.8.0 and above can run Grunt well).
-
For convenient use of Grunt, we can install our Grunt into our global variables, so that we can use Grunt in every project.
npm install -g grunt-cli
Through these two steps above, we have installed Grunt. Later we can use it directly in our command line.
Note that installing grunt-cli does not mean installing the grunt task runner! The job of the Grunt CLI is simple: call and run the corresponding version of Grunt already installed in the Gruntfile directory. This means multiple versions of Grunt can be installed on the same machine at the same time.
How to use Grunt to manage projects?
- First, you need to add two files to the project: package.json and Gruntfile.js. Among them, package.json is used by npm to store metadata for project configuration. You can learn from here npm init. You can generate our project’s package.json through this command. The configuration most closely related to Grunt is in devDependencies. This is the package.json of one of my Node.js projects:
{
  "name": "twMovie",
  "version": "0.0.1",
  "description": "twMovie is builded by node and mongodb",
  "main": "app.js",
  "dependencies": {
    "body-parser": "^1.10.2",
    "connect-mongo": "^0.7.0",
    "cookie-parser": "^1.3.3",
    "crypto": "0.0.3",
    "express": "^4.11.1",
    "express-session": "^1.10.1",
    "grunt-concurrent": "^1.0.0",
    "jade": "^1.9.1",
    "moment": "^2.9.0",
    "mongoose": "^3.8.22",
    "morgan": "^1.5.1",
    "path": "^0.11.14",
    "serve-favicon": "^2.2.0",
    "underscore": "^1.7.0"
  },
  "devDependencies": {
    "grunt": "^0.4.5",
    "grunt-concurrent": "^1.0.0",
    "grunt-contrib-watch": "^0.6.1",
    "grunt-nodemon": "^0.3.0"
  },
  "scripts": {
    "test": "echo \"Error: no test specified\" && exit 1"
  },
  "repository": {
    "type": "git",
    "url": "https://github.com/tw93/twMovie.git"
  },
  "keywords": [
    "twmovie",
    "movie"
  ],
  "author": "tw93",
  "license": "ISC",
  "bugs": {
    "url": "https://github.com/tw93/twMovie/issues"
  },
  "homepage": "https://github.com/tw93/twMovie"
}- Then enter the project directory in the command line, type the following command, and npm will download the required grunt and its plugins to your project directory according to the configuration in devDependencies.
npm install grunt --save-dev
-
Next, you need to create a new file called Gruntfile.js. It is used to configure or define Grunt tasks and load Grunt plugins. This file is an “entry file” when we run grunt in the command line. We need to set our custom tasks in this file. For details, you can see Grunt’s official documentation.
-
Finally, through the grunt command, our project can be run automatically. Note: I wrote a relatively complete Gruntfile.js like this:
module.exports = function(grunt) {
    grunt.initConfig({
        watch: {
            jade: {
                files: ['views/**'],
                options: {
                    livereload: true
                }
            },
            js: {
                files: ['public/js/**', 'models/**/*.js', 'schemas/**/*.js'],
                // tasks: ['jshint'],
                options: {
                    livereload: true
                }
            }
        },
        nodemon: {
            dev: {
                script: 'app.js',
                options: {
                    file: 'app.js',
                    args: [],
                    ignoredFiles: ['README.md', 'node_modules/**', '.DS_Store'],
                    watchedExtensions: ['js'],
                    watchedFolders: ['./'],
                    debug: true,
                    delayTime: 1,
                    env: {
                        PORT: 3000
                    },
                    cwd: __dirname
                }
            }
        },
        concurrent: {
            target: {
                tasks: ['nodemon', 'watch'],
                options: {
                    logConcurrentOutput: true
                }
            }
        }
    });
    grunt.loadNpmTasks('grunt-contrib-watch');
    grunt.loadNpmTasks('grunt-nodemon');
    grunt.loadNpmTasks('grunt-concurrent');
    grunt.option('force', true);
    grunt.registerTask('default', ['concurrent:target']);
};
It is still recommended that everyone read more of Grunt’s official documentation. Learning through official documentation will be faster.